London, a city steeped in history and architectural marvels, offers photographers an unparalleled canvas to capture stunning imagery. The key to elevating your London photography lies in understanding and harnessing the city's unique light conditions. From the golden hues of sunrise over the Thames to the atmospheric fog that often blankets the city streets, mastering London's light can transform your photos from ordinary snapshots to breathtaking works of art.
Photographers who truly excel in capturing London's essence know that timing is everything. The interplay of light with the city's iconic landmarks, bustling streets, and hidden corners creates magical moments that can make or break a shot. Whether you're a seasoned professional or an enthusiastic amateur, understanding when and how to leverage London's light will significantly enhance your photographic repertoire.
Golden hour photography techniques for London landmarks
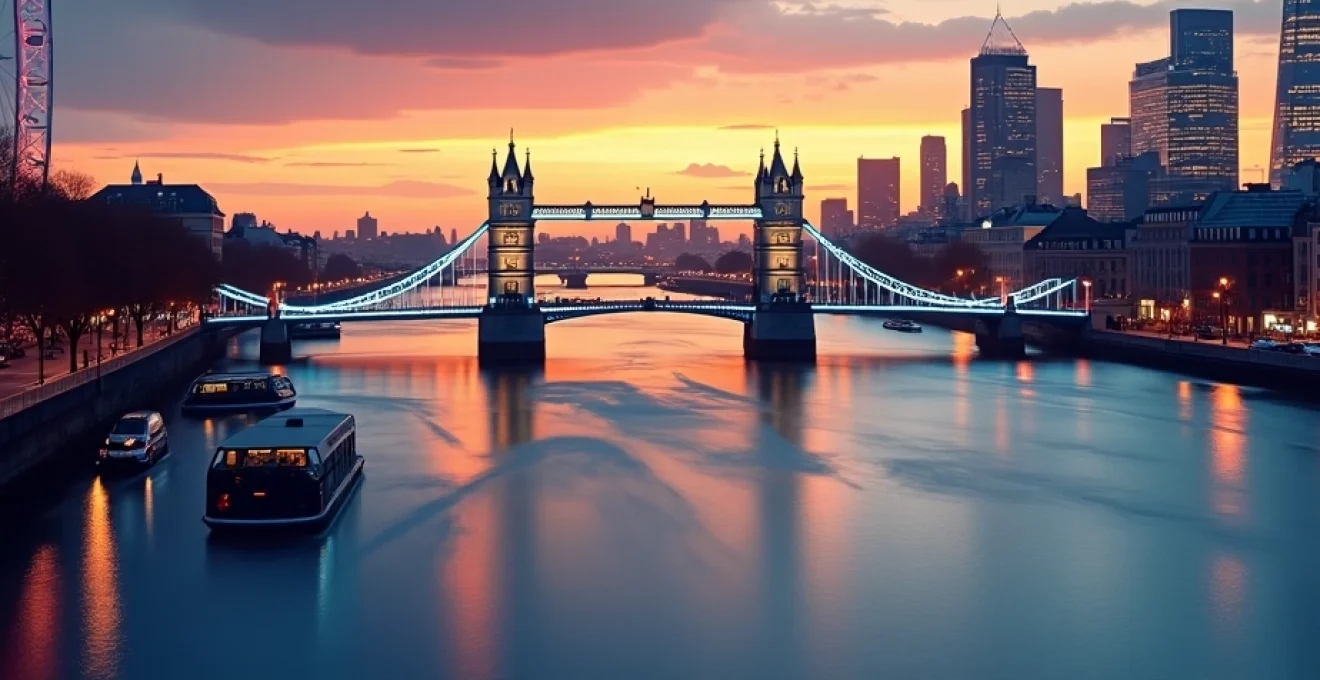
The golden hour, that magical time just after sunrise or before sunset, bathes London in a warm, soft light that can transform even the most familiar landmarks into extraordinary subjects. This fleeting period offers photographers a unique opportunity to capture the city's iconic structures in their most flattering light.
To make the most of golden hour photography in London, timing is crucial. During summer months, the golden hour occurs around 5:00 AM and 9:00 PM, while in winter, it shifts to approximately 7:30 AM and 3:30 PM. Planning your shoots around these times can yield spectacular results, especially when photographing landmarks like the Tower Bridge or the Houses of Parliament.
One effective technique for golden hour photography is to use a wide-angle lens to capture the expansive sky and its rich colors. Position yourself to include foreground elements that can catch the golden light, adding depth and interest to your composition. Experiment with different exposures to balance the bright sky with potentially shadowy architectural details.
Consider using a graduated neutral density filter to balance the exposure between the bright sky and darker foreground elements. This can help you capture more detail in both areas of your image, resulting in a more balanced and visually appealing photograph.
Golden hour light can reveal textures and details in London's architecture that are often missed in harsh midday sun, offering a fresh perspective on even the most photographed landmarks.
When shooting during golden hour, be prepared to work quickly. The quality of light changes rapidly, and you may only have a 15-20 minute window to capture the perfect shot. Scout your location in advance and have your equipment ready to make the most of this brief but beautiful period.
Seasonal light variations in London's urban landscape
London's light characteristics change dramatically with the seasons, offering photographers a diverse palette to work with throughout the year. Understanding these seasonal variations can help you plan your shoots effectively and capture the city in its many moods.
Winter solstice: capturing low-angle light at tower bridge
The winter solstice presents a unique opportunity for photographers in London. The low angle of the sun creates long shadows and dramatic lighting conditions, particularly when photographing iconic structures like Tower Bridge. During this time, the sun's position can illuminate the underside of the bridge's walkways, creating interesting patterns and textures.
To capture the best shots during the winter solstice, arrive early and position yourself on the south bank of the Thames. Use a tripod to stabilize your camera for longer exposures, as the light levels will be lower. Consider using a polarizing filter to enhance the contrast between the sky and the bridge structure.
Spring equinox: optimizing exposures in St. James's Park
As spring arrives in London, St. James's Park bursts into bloom, offering photographers a vibrant subject matter. The spring equinox brings longer days and more balanced light, perfect for capturing the park's flora and fauna. During this time, the light is often softer and more diffused, ideal for close-up shots of flowers or wider landscapes featuring the park's lake and wildlife.
When shooting in St. James's Park during spring, use a shallow depth of field to isolate flowers or animals against a blurred background. The softer light allows for longer exposures without harsh shadows, so experiment with slower shutter speeds to capture movement in water features or swaying branches.
Summer long days: twilight photography at the London Eye
Summer in London means extended daylight hours and prolonged twilight periods, offering ample opportunity for dramatic photography at landmarks like the London Eye. The "blue hour" just after sunset can last for up to an hour, providing a perfect backdrop for capturing the illuminated Eye against the deepening sky.
To make the most of summer twilight photography, use a sturdy tripod and remote shutter release to avoid camera shake during longer exposures. Experiment with different white balance settings to capture the nuances of the changing light and the artificial illumination of the London Eye.
Autumn foliage: enhancing colors in Hyde Park
Autumn brings a spectacular display of colors to London's parks, with Hyde Park being a prime location for capturing the season's beauty. The changing foliage creates a warm palette that contrasts beautifully with the park's expansive lawns and lakes.
When photographing autumn scenes in Hyde Park, use a polarizing filter to enhance the rich colors of the leaves and reduce glare from wet surfaces. Early morning or late afternoon light can add warmth to your images, intensifying the autumnal hues. Consider using a telephoto lens to compress the scene and create a dense, colorful backdrop of foliage.
Optimal camera settings for london's atmospheric conditions
London's unique atmospheric conditions, from its famous fog to the ever-changing skyline, require photographers to be adept at adjusting their camera settings to capture the city's essence. Mastering these settings can mean the difference between a mediocre shot and a stunning image that truly captures London's atmospheric beauty.
Managing ISO in London's foggy mornings
London's infamous fog can create ethereal scenes, but it also presents challenges in terms of light and contrast. When shooting in foggy conditions, managing your ISO settings is crucial. Start with a low ISO (100-400) to minimize noise, but be prepared to increase it if the fog is particularly dense.
Use aperture priority mode ( A or Av ) with a wide aperture (f/2.8-f/5.6) to allow more light into the sensor. This will help you maintain a faster shutter speed, reducing the risk of camera shake in low-light conditions. Experiment with exposure compensation, often +1 or +2 stops, to prevent the camera from underexposing the scene due to the bright, diffused light of the fog.
Aperture selection for Thames riverside scenes
The Thames riverside offers a plethora of photographic opportunities, from wide vistas to detailed architectural shots. Selecting the right aperture is key to capturing these scenes effectively. For sweeping views of the river and its surroundings, use a smaller aperture (f/11-f/16) to ensure sharpness throughout the frame.
When focusing on specific architectural details or creating portraits with the river as a backdrop, switch to a wider aperture (f/2.8-f/5.6) to create a pleasing bokeh effect. This can help isolate your subject against the busy backdrop of the Thames.
Remember that the reflective surface of the Thames can dramatically affect your exposure. Use spot metering on mid-tones to achieve a balanced exposure across both water and sky.
Shutter speed techniques for capturing London's moving lights
London's vibrant nightlife and bustling traffic provide excellent opportunities for creative light trail photography. To capture these dynamic scenes, mastering shutter speed techniques is essential. For classic light trails from traffic, use a tripod and set your camera to manual mode with a slow shutter speed (10-30 seconds).
Start with an aperture around f/11 and ISO 100 to maintain image quality. Adjust your shutter speed based on the speed and density of traffic to achieve the desired effect. For more abstract light paintings, experiment with even longer exposures and intentional camera movement to create unique patterns and streaks of light.
Location-specific timing for prime London photography
Knowing the optimal times to photograph specific London locations can dramatically improve your chances of capturing stunning images. Each landmark has its own "golden hour" that extends beyond just the quality of light to include factors like crowd levels, architectural lighting, and seasonal variations.
For instance, St. Paul's Cathedral is often best photographed in the early morning, around 6-7 AM, when the rising sun illuminates its eastern façade and the surrounding area is relatively quiet. This timing not only provides beautiful light but also allows for unobstructed views and the opportunity to include interesting foreground elements without crowds.
The Tower of London, on the other hand, can offer dramatic shots just after sunset when the floodlights come on, creating a striking contrast between the ancient fortress and the modern cityscape behind it. Aim to be in position about 30 minutes after sunset to capture this magical transition.
Trafalgar Square presents an interesting challenge due to its constant activity. However, visiting during the blue hour (just after sunset) can yield captivating images as the square's fountains and statues are illuminated against the deepening sky. The mix of artificial and natural light during this time creates a dynamic and colorful scene.
For those seeking to capture the essence of London's financial district, the area around the Gherkin and Lloyd's building is best photographed on weekends. The reduced foot traffic allows for cleaner compositions, and the play of light between the glass and steel structures can be particularly striking in the late afternoon sun.
Advanced post-processing for London's unique light signatures
Capturing London's distinctive light is only half the battle; bringing out its full potential in post-processing is equally crucial. Advanced editing techniques can help accentuate the unique qualities of London's light, from the soft glow of a misty morning to the sharp contrasts of its modern architecture.
HDR techniques for balancing London's contrasting skyline
London's skyline, with its mix of historic and modern architecture, often presents extreme contrasts that can be challenging to capture in a single exposure. High Dynamic Range (HDR) techniques can be invaluable in these situations. To effectively use HDR:
- Shoot multiple exposures (at least 3) bracketed at -2, 0, and +2 EV
- Use a tripod to ensure perfect alignment between shots
- In post-processing, merge the exposures using specialized HDR software or Photoshop's HDR Pro
- Adjust tone mapping carefully to maintain a natural look while balancing highlights and shadows
Remember to use HDR judiciously ; the goal is to create a balanced image that captures the scene as your eye sees it, not to produce an over-processed result.
Color grading to enhance London's historical architecture
Color grading can significantly enhance the mood and atmosphere of your London photographs, particularly when dealing with historical architecture. The goal is to accentuate the timeless quality of these structures while maintaining authenticity.
Start by adjusting the white balance to emphasize the warm tones of stone buildings or the cool hues of London's often overcast sky. Use the HSL (Hue, Saturation, Luminance) panel in your editing software to fine-tune specific color ranges. For instance, enhancing the oranges and yellows can bring out the warmth in brickwork, while adjusting blues and cyans can add depth to the sky.
Consider creating a custom preset or LUT (Look-Up Table) that enhances London's unique color palette. This can help maintain consistency across a series of images and speed up your workflow for future editing sessions.
Noise reduction strategies for low-light London scenes
Low-light photography in London, whether capturing the city's nightlife or moody, foggy mornings, often requires higher ISO settings that can introduce noise into your images. Effective noise reduction is crucial for maintaining image quality without losing detail.
Start with in-camera noise reduction if available, but be cautious as it can sometimes lead to a loss of fine detail. In post-processing, use a combination of luminance and color noise reduction. Begin with color noise reduction, as it's often less destructive to detail, then apply luminance noise reduction conservatively.
For challenging images, consider using advanced noise reduction software like Topaz DeNoise AI or DxO DeepPRIME. These AI-powered tools can dramatically reduce noise while preserving edge detail and texture.
When applying noise reduction, zoom in to 100% view and toggle the effect on and off to ensure you're not over-smoothing the image and losing essential details.
By mastering these advanced post-processing techniques, you can elevate your London photography, bringing out the city's unique light signatures and creating images that truly capture its essence. Remember that subtlety is key; the goal is to enhance the natural beauty of London's light, not to create an artificial look that detracts from the authenticity of your photographs.